Hi there friends,
This past weekend I had a few hours of free time in the shop (which rarely happens) and a small work table that needed a new top. Here’s what I came up with.
I’ve been trying to think of some new ideas with the domino XL to see what kinds of different things could be done! I’ve been using it primarily at work, and then bringing it home with me every night playing around with ideas that pop up during my work day. So with the free time here is what I did!
I decided on giving breadboard ends a try. Probably a bit overboard for my work table, but what the hey! Anyhow, I started with some scrap maple laminated to a slab 1″ thick by roughly 30″x39″. And for the ends I decided on using some walnut 1″x5″x30″.

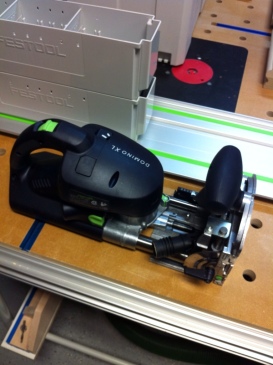
Materials ready to go, and the Domino XL about to go to work!
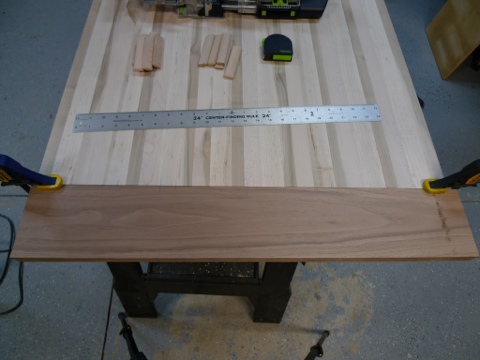
Walnut pieces clamped up to lay out the Domino’s mortise lines. I used five 8x100mm Dominos on each side.
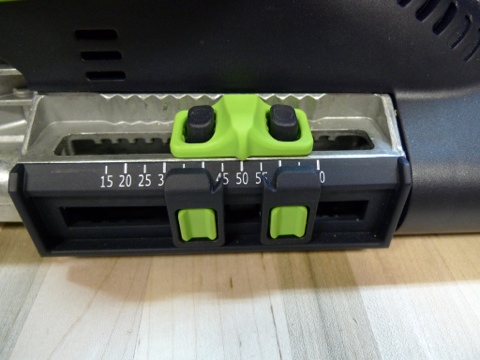
Here I have the XL set for a depth of 50mm, that was used for all mortises. Although not used on this project the limit stops on the depth selection is a great feature.

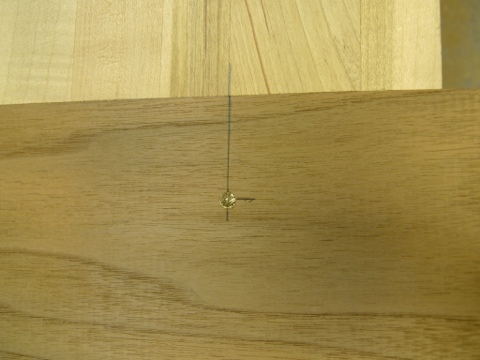
Pin holes marked and ready to be drilled.

The dominos were glued in place and left overnight to thoroughly dry. A few more taps to ensure a proper test fit…perfect!
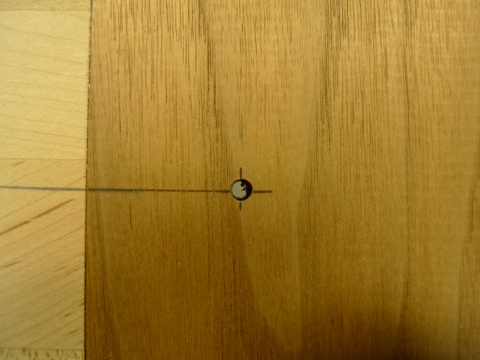
I first drilled the holes all the way through the outer walnut ends. Then before installing the outer piece I drilled each domino with the same size hole just a touch to the inside to draw the ends tight as the pins are driven home. You can see the slight offset in the photo above.

I opted to use brass pins that I cut from a length of rod I had leftover from another project. Could have used anything really but the brass sands easily enough and I thought it would look pretty cool!

All pins driven in and secured tightly. Sanded down to 220 and ready for some Arm R Seal.

Minutes after applying the oil.

Close up of brass pin sanded and finish applied.
While I don’t think this project is typical of what you all would do with the XL, it was lots of fun. It has also sparked some more ideas that I have for this amazing tool. This machine gave me the ability to do in a few hours what would have taken me probably a week to accomplish in my home shop! (with two little ones shop time is very few and far between, as I’m sure some of you know :)).
Also a few small notes.
All mortises on the main top (maple portion) as well as just the center mortise on the end caps (walnut ends)were cut with NO play. While the remaining mortises were cut with some play in order to allow for wood movement. Also the only Domino tenon that received glue on the end cap side is the center Mortise. The rest were just pinned, this is also to allow for wood movement.
I hope you all enjoyed this post. Please feel free to post any comments or questions.
Thanks again for following along, and be sure to subscribe!
Take care of yourselves,
Jim
Hello Woodworkers,
First I would like to start out by thanking everyone at Festool for giving me the opportunity to put this great machine to the test. As one of the 25 chosen testers I would like to invite anyone who has any questions, or would like to see the XL perform any certain task, feel free to email or comment and I will do my best to help.
Upon arrival and unpacking the XL, and Domino Systainers, I saw a few small features that I thought were pretty neat.
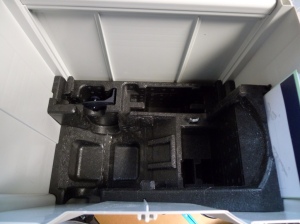
- The inside of the Systainer that cradles the XL is made of a high density foam. This really seats the XL in there very well and feels very sturdy.
- The Systainer has two removable trays that have three separate compartments to carry Dominos on board. Very cool!
- The Systainer top has slots to keep all four domino cutters.
All small details, but I thought they were cool enough to mention and show you all!
Now onto the XL. My first impression was this thing is a beast! I guess being an owner of the Domino 500, makes it seem that much bigger. But when you have it in your hands it feels perfect! The fence on the front is almost identical in feel and layout as the Domino 500. And when in the cutting position just a fair amount of pressure on the front handle and most of the weight is supported, with the rear handle almost solely dedicated to the plunging action. One of my worries was that the XL would be awkward or clumsy on smaller pieces, which hasn’t been the case thus far. As you can see below in my first few test cuts on some small sections of handrail. Poplar handrail pieces joined with the 12mm cutter. Domino size 12mm x 140mm and 12mm x 60mm (trimmed).
On the test cuts I referenced off of the bottom because it was flat. Being the top of the handrail I used comes to a peak, made it a little tricky. What I did was center the peak in my t-track slot on my MFT, and clamped it down before mortising.

Hello Woodworking Friends,
This is my Festool story of how I got hooked on these amazing tools. They have changed the way I work from day to day. In addition they have made my job that I love so much, that much more enjoyable!
A few years back I had seen and heard of a brand of tools by the name of Festool. I had seen them displayed at my local Woodcraft and would always check them out from afar, as they were in their own little section, far from the other tools. I would never spend that much time looking at them, always thinking, how much better could they be? Simply put they were out of my price range, and I was getting by with what I had. Then one day at my local Woodcraft I had seen a few of the Festool dust extractors for sale with a pretty good discount (demo units). The store owner Matthew had noticed me looking at one, as I was in need of a shop vacuum/dust extractor for my home shop. He insisted it was a great machine and that these tools very rarely are had at any sort of discount. At the time I didn’t have the money and was really considering purchasing the extractor. After doing some heavy investigating on the Internet when I got home, I decided I “needed” to have this machine (all you woodworkers know what I mean). A few days later I had finished a small job I was working on and with that money I decided to go back and get my first Festool. As I walked through the front door of Woodcraft I was welcomed by Matthew and a few other employees, after a quick hello I made a bee line for the extractor. Phew, it was still there! I smiled and continued walking around the store as I had a few more items to get. Matthew had walked up and said to me ” I saw you looking at the ct 22 over there” I had told him I had done some research on it, and agreed it was an awesome piece of equipment. He responded with “if you want it I will give you an extra 5% off the already marked down price”. I smiled from ear to ear, headed right to the cash register and the rest is history………oh, and yes I forgot to get the other items I needed that day!
That day had changed my outlook on woodworking forever! Immediately I brought home the dust extractor and hooked it up to any tool I could find. An old porter cable random orbit sander had fit the bill. I grabbed a piece of walnut and with the extractor hooked up I fired up the sander and just started sanding and sanding. After about 3 minutes of continuos sanding I flipped the power off and looked at the board. The walnut board looked great! Even with my beat up old PC sander. No dust on the board, and just a small trace left on the paper. Then when I had set the piece of walnut back down into the scrap pile I looked up and was in shock! Normally when I did this type of sanding my entire shop was covered in a cloud of fine dust particles from one end to another. The Festool system was different!
Until this day I have never had to replace any of my Festool products. Their customer service and warranties are second to none. They produce the highest quality tools available and the dust collection is absolutely amazing. I will forever support a company that stands for these beliefs and backs them up. If you ever have a chance to try any of these tools out at your local woodworking store, I urge you to give them a shot. You will pay more for Festool’s than for regular tools but precision, quality, and speed at which you produce will greatly improve. And if nothing else the dust extraction will keep you from breathing most of the fine dust particles that are extremely bad for our health. And you can’t put a price on that!
Thanks for reading, and please feel free to comment or email with any questions.
Have fun and be safe,
Jim
